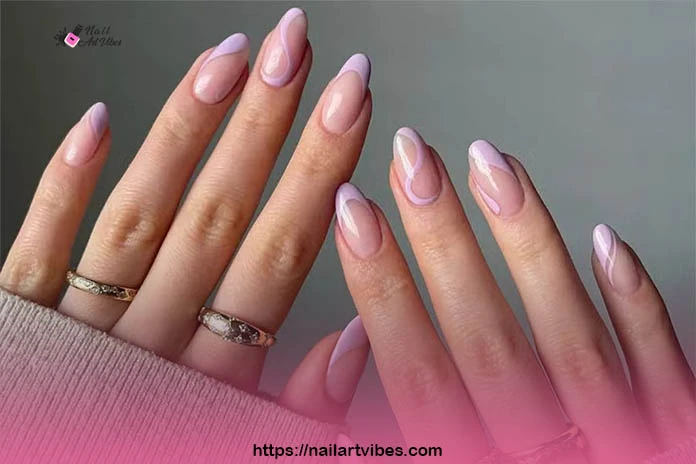
How To Apply DIY Poly Gel Nail Fills At Home Successfully

DIY poly gel nail fills are easier than you might think, think of this blog as just a simple guide to make your nails look awesome.
We’re going to talk about when and why to do poly gel nail fills and how to do it. Whether you’re a nail pro or just starting, we’ve got the straightforward steps to help you become a DIY nail fill expert.
You will not have to feel worried about expenses as we’ll keep it simple and budget-friendly. We’ll guide you with easy tips and share the ups and downs of DIY poly gel fills.
What is a Poly Gel Nail Fill?
A poly gel nail fill is a crucial upgrade for your nails. When your natural nails grow, a gap appears near the base of your poly gel nails. That’s where poly gel nail fills are functional, ensuring that your nails stay healthy. It’s like saying your nails, “I’ve got you covered.”
This process means we focus on every detail, fixing that gap and making your poly gel nails look brand-new.
Why get worried? Because it maintains the fabulous look of your nails for a longer time. It is a technique for the lasting and flawless charm of your poly gel manicure.
Why and When Poly Gel Fill is Needed?
Poly gel fills are a must because, as we discussed when your natural nails grow, they create a gap between the poly gel and your cuticle that you can notice. If you don’t take care of this gap, it can mess up how your manicure looks and holds up.
Regular fills are your way to maintain the strength and beauty of your poly gel nails. So, when you see that gap, it’s a sign that your nails need a little poly gel to fill the magic!
Can We Do Poly Gel Nail Fill at Home? How to do it?
Absolutely! Opting for DIY poly gel nail fills at home keeps your wallet happy. Dedication and the right tools are your companions on this journey to becoming a DIY expert.
It’s a skill that allows you to skip the salon expenses and get the same treatment on your terms. Saving money and enjoying beautiful nails is what you get when you do at-home poly gel nail fills.
So, get the essential tools and let the process begin;
Materials Needed:
- Poly gel kit
- Nail file and buffer
- UV/LED lamp
- Base coat and top coat
- Nail cleanser or alcohol wipes
Step-by-Step Guide:
Step 1: Prep Your Nails
Begin the process by ensuring your nails are clean. Remove any existing polish and shape your nails according to your preference. Now, Gently buff the poly gel surface to create an ideal texture for optimal adhesion. This step is essential to guarantee a seamless and long-lasting fill.
Step 2: Apply Base Coat
Once your nails are prepped, apply a thin layer of the base coat from your poly gel kit. This layer serves as the foundation, enhancing the adhesion of the poly gel. Place your nails under the UV/LED lamp and cure the base coat according to the specified time mentioned in the kit instructions. This ensures a solid and durable base for the fill.
Step 3: Fill in the Gap
Now, Use the poly gel from your kit and apply it in thin layers for precision. Work slowly, shaping and smoothing the poly gel with a brush or spatula. This step demands attention to detail, ensuring an even and natural-looking result.
Step 4: Cure Under the Lamp
After applying the poly gel, place your nails back under the UV/LED lamp for the curing process. Follow the recommended curing time provided in your kit instructions. Proper curing solidifies the poly gel, making it long-lasting. Be patient during this step to ensure thorough curing.
Step 5: Apply Top Coat
Now apply a coat of top coat to finalize with an extra layer to protect your DIY poly gel manicure.
Cure the top coat under the UV/LED lamp according to the specified time. This final touch enhances the overall aesthetic and durability of your DIY poly gel fill.
Step 6: Shape and Buff
Once the curing process is complete, shape and buff your nails to achieve the desired length and smoothness. Pay attention to refining the shape, and ensure that the surface is perfectly smooth for a polished finish.
Step 7: Cleanse Your Nails
Now, clean your nails nicely using alcohol wipes or remover. Take your time during this step to appreciate the transformation.
Step 8: Hydrate and Moisturize
Complete your DIY poly gel nail fill by hydrating your cuticles. Now, you need to give your nails a complimentary cuticle oil massage as you’re finally done with the process.
Precautions for DIY Poly Gel Nail Fills at Home:
It’s crucial to take some precautions to ensure a safe and successful experience of doing poly gel nail fills at home. Here you go:
Ventilation:
Make sure that the area where you’re doing the process is properly ventilated and air is passing through. This is because you need to find a safe way to inhale fumes.
Potent Allergies and Sensitivities:
A patch test is required before doing the process to know if you don’t have allergies or conditions with it.
UV/LED Lamp Safety:
Using anti-UV gloves is a must to save your hands from the adverse effects of the UV lamp.
Proper Application:
Follow the instructions provided with your poly gel kit. Do it with gentle hands for durability and evenness.
Avoid Skin Contact:
Keep poly gel away from your skin and cuticles. If accidental contact occurs, use a cuticle stick or cotton swab to gently remove any excess product before curing.
Nail Health:
If you have underlying nail health issues or infections, it’s advisable to consult with a professional before attempting poly gel nail fills at home.
Patient Curing:
Allow each layer to cure fully under the UV/LED lamp. Rushing the curing process may result in an uneven application and affect the overall quality of the fill.
Proper Removal:
When it’s time for a new fill or removal, follow proper procedures to avoid damaging your natural nails. Use acetone and gentle techniques to dissolve and remove the poly gel.
Seek Professional Guidance:
Professional guidance is really important if you are new to toggle nails or if you’re not a pro at doing it yourself.
FAQ’s
How many times can you fill gel nails?
Gel nails can typically be filled multiple times, usually up to three or four times. However, it’s essential to monitor the health and condition of your natural nails to determine when a new set is necessary.
How many times can you fill Polygel?
Polygel, being durable, can often withstand more fills compared to traditional gels. It’s common to get three to four fills with Polygel, depending on the condition of your nails and the quality of the initial application.
Can I file my Polygel nails?
Yes, you can file Polygel nails. Use a gentle file to shape or shorten them. However, be cautious not to file too aggressively to maintain the integrity of the Polygel.
Can you do a fill-on Polygel?
Yes, you can do a fill on Polygel nails. Follow the proper procedure of prepping, filling the growth gap, and curing under a UV/LED lamp for a seamless and refreshed appearance.
Conclusion:
You’ll soon find yourself maintaining stunning nails in the comfort of your home if you learn these DIY procedures.
You will find the satisfaction of a salon-worthy manicure without getting your budget out. By only getting to know the procedure and getting the supplies gathered nothing can stop you from going forward.


