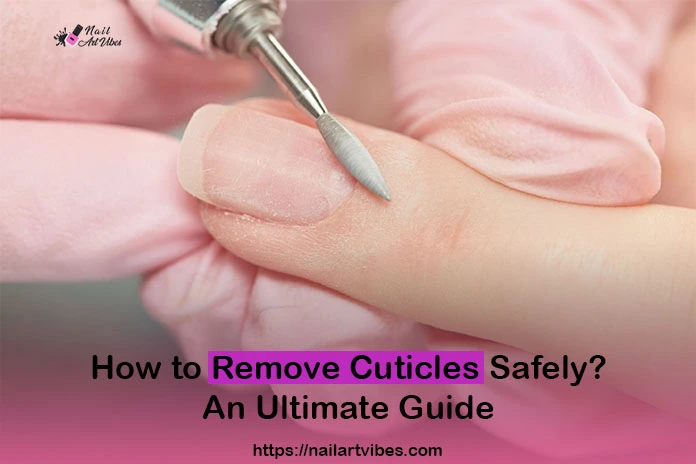
How To Push Back Your Cuticles | Remove Your Cuticles at Home
Welcome aboard to our nail care journey, curated specially for those who are always in the public eye or who take pride in their appearance. We’ll guide you in professionally treating cuticles in the comfort of your home. By the end of our process, expect nothing less than perfection in your nails.
Knowing how to remove cuticles is just the start. Stay with us and explore how you can do it at home easily;
What are Nail Cuticles and Why Remove Them?
First things first, let’s understand what cuticles are. When you know the problem, you’re on the right path to find the solution, so let’s start from the basics.
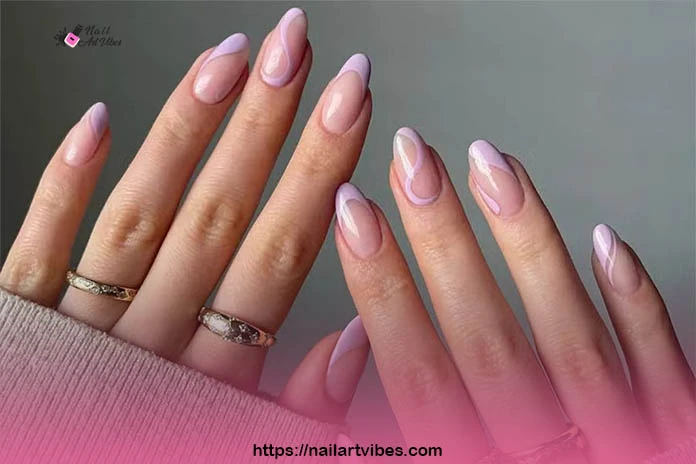
The thin skin at the base of your nails is a barrier against bacteria and infections, is the cuticle. Being vital, overgrown cuticles can detract from your nails’ appearance, making them look less neat.
By carefully removing cuticles, you can achieve a clean, refined look for your nails.
Related Article: How To Remove Cuticles Without Cutting?
Push back or remove your cuticles, While You’re into Cuticle Care?
When you’re into nail and cuticle care, the decision to push your cuticles back or remove is the point of consideration.
If you have certain conditions that support cutting your cuticles, as if you have dry cuticles, go for them, otherwise, pushing the cuticles back is way better.
When you cut this cuticle skin around the nail, you cut that barrier out, which helps to prevent infection and irritation.
Pushing them back keeps your cuticles safely and effectively there for you while functioning fine. While, on the other hand, when you properly remove your cuticles, it can be more effective for thick or overgrown cuticles, but it carries a higher risk of infection, bleeding, and pain.
Removing cuticle requires a nail tech perfection, so do not do it at home, and also requires repeated maintenance. Overall, pushing back cuticles is a gentler and more natural approach that prioritizes nail health and safety, making it a better option for most people.
Step-by-Step Guide to Pushing Back Cuticles
Step 1: Prepare Your Tools
- Cuticle pusher.
- Cuticle remover cream or oil.
- Nail file or buffer.
- Cotton balls or pads.
- Nail cleanser.
- Cuticle oil or moisturizer.
Let’s Start!
- Add some warm water and a tbsp of coconut or olive oil.
- Give it a good mix and keep your hands soaked in the bowl for 5-10 minutes.
- Now at this point, gently massage to soften your cuticles, preparing for the damage-free process.
- Now, apply a dot of cuticle remover onto your cuticles and gently massage it to penetrate the cuticle skin.
- Start pushing back your softened cuticles starting from the base towards knuckles. Use a gentle sweep hand to proceed, avoiding nail infections.
- Moisturize your cuticle skin using a circular motion, go for a gentle, fragrance-free moisturizer.
- Now, with a cotton ball or pad, gently wipe away any greasy residue. For further cleansing, you may apply a nail cleanser.
You have successfully done the procedure, congratulations!
How to Remove Cuticles If You Still Insist:
Cuticle removal is a bit invasive method, and it is recommended to get it done by a professional nail technician. If you still choose to remove cuticles, here’s a step-by-step guide:
- Remove your polish and rinse off your nails nicely as we need clean and dry cuticles.
- Push back your cuticles with cuticle pushers’ round edge, as we did in the first procedure.
- Now, to soften your cuticles, soak your tips in warm water for a few minutes.
- It is your time to apply a cuticle remover cream to the cuticle skin.
- Wrap your tips using gauze or cotton pad to let the remover penetrate nicely.
- Wait for 5-10 minutes to let the remover break down the dead cuticle skin.
- Unwrap your tips, remove the residue and wash off.
- At this point, apply an antiseptic to the cuticle area.
- Finally moisturize your cuticles with a nice fragrance-free moisturizer to avoid irritability.
Do not try at home as it can cause infection and irritability, always look for a nail tech for consultation and procedure.
Aftercare and Maintenance for Healthy Cuticles
Follow the below tips to keep your cuticles healthy and always in shape;
- Always keep your cuticle moisturized.
- Clean hands do not let infections sit, keep your hands clean always.
- Never push your cuticles too much if you want to remove irritation and damage.
- Always use a gentle touch for doing sensitive procedures.
- Be careful when using a nail file, let the some white part still be there when you trim to avoid damage.
- File your nails in one direction only.
- Always Stay Hydrated.
FAQ’s
Q: How often should I push back my cuticles?
A: In every 4-6 weeks, consider pushing your cuticles back.
Q: Can I use a cuticle remover cream at home?
A: If you know the right technique, yes! You can do it at home. However, be cautious about the quantity always.
Q: How to prevent cuticle dryness and cracking?
A: By keeping your cuticles moisturized and hydrated, you are one step away from dryness and cracking.
Q: If I have nail fungus, can I push back my cuticles?
A: No, when having nail fungus, pushing cuticles back can cause increased infection and worsen the condition. Better consult a doctor or nail professional for better advice and proper treatment.
Q: Do I need cuticle tools and products for healthy cuticles?
A: No, it is not necessary, but to be on the safer side you should have them.
Conclusion:
Everyone should take proper cuticle care because it defines the beauty and health of our nails. If you’re someone who loves diy procedures, when it comes to a sensitive procedure, just like cuticle removal, be cautious, use the right products, and the right quantity.
Be soft with your hands, because with harsh hands you will destroy every sensitive procedure.