DIY Spooky Halloween Nail Art & Stickers in 2025
I’m thrilled today to guide you through the mesmerizing world of Halloween art. Here comes the good news, you can create DIY nail wraps 3d nail art.
You can prepare these nail decal nail art in advance matching with your Halloween costume and can get a quick ghost nail manicure out of these nail wraps on the day.
In this detailed guide, I’ll take you step-by-step through the process of creating your very own DIY Halloween nail decal skull. Celebrate the DIY Halloween stickers day when it’s just around the corner and you will get an extra event to enjoy.
Get ready to elevate your nail game and become the life of the Halloween party!
1. Gathering Supplies
In the realm of nail artistry, preparation is key. Before embarking on your Halloween art sticker decals adventure, ensure you have an arsenal of nail supplies ready at your fingertips:
Nail Polish in Halloween Colors
Select your nail polish colors with the meticulousness of an artist selecting their paints. Use glow-in-the-dark gel polishes preferably. For Halloween, delve into a spectrum of shades that encapsulate the season’s eerie essence:
- Mysterious Black Nail Paint: The quintessential Halloween hue, evoking the darkness of the night.
- Eerie Orange Nail Polish: Channel the warmth of jack-o’-lanterns and autumn leaves.
- Bewitching Purples: Perfect for adding a touch of mystique to your Halloween designs.
- Ghostly Greens: A color associated with ghouls and ghosts, perfect for creepy accents for Halloween DIY dark ghost nail wrap making.
Clear Nail Polish or Topcoat
Think of clear gel nail paint or thin nail topcoat as your nail art’s guardian. Not only does it provide an enticing shine, but it also serves as a protective layer, sealing your nail designs securely in place.
Nail Art Brushes or Toothpicks
Imagine these tools as the paintbrushes in your nail art studio. Nail art brushes and toothpicks allow you to execute intricate details with the precision of a seasoned artist, ensuring every stroke and dot is perfect to make stickers ghost designs.
Nail Wraps or Adhesive Paper
Wraps are your canvas, and they come in various forms. You can either purchase pre-made ones or create your own using clear adhesive sheets, giving you complete control over your designs.
Scissors for Precise Cutting
Like a sculptor shaping their masterpiece, you’ll need scissors to trim and cut your wraps with the utmost precision, ensuring they fit your nail contours flawlessly.
Tweezers to Pick With Comfort
Handling delicate nails requires a surgeon’s precision, and tweezers are your trusted instrument. They ensure you can place your stickers with accuracy and grace.
Nail File for Shaping and Prepping
Just as an artist prepares their canvas, you must shape and prep your nails. A quality nail file is essential for achieving the perfect canvas for your Halloween masterpiece.
Halloween-themed Images
You can choose cured nail polish wraps to ease the procedure of making Halloween season ghost stickers.
With this meticulously assembled array of supplies, you’re poised to embark on your Halloween nail art journey with the expertise and precision of a seasoned artist. Now, let’s delve further into the creative process and bring your Halloween sticker vision to life.
2. Choosing Your Halloween Designs:
Scream Halloween nail wraps can help you go with spooky nail art for Halloween day. So you should select the best designs for spooky Halloween nail art stickers. Halloween offers an endless array of design possibilities.
Consider the following:
- Spiders, Bats, Pumpkins, Ghosts, Witches: These classic icons never go out of style.
- Classic vs. Modern Motifs: Decide whether you want a traditional Halloween look or a more contemporary twist.
- Personalized Nail Sticker Ideas: Craft your unique designs to make a statement.
3. Creating Your DIY Nail Decals:
- Printing and Cutting Designs: Ensure your designs fit your nails and maintain proper proportions.
- Applying a Clear Base: Start with a clean slate by applying a clear base coat.
- Designing with Nail paint: Bring your chosen Halloween colors to life by carefully painting your designs.
- Adding Details with Toothpicks or Brushes: Achieve precision by using these tools for intricate work.
- Letting the Designs Dry: Patience is a virtue; let your creations dry thoroughly.
4. Preparing Your Nails:
- Cleaning and Shaping: Make sure your nails are clean and properly shaped before you start the process.
- Applying a Base Coat: On your clean and nicely shaped nails apply a thin base coat to get started with the process.
- Painting Your Nails: Now layer it with your favorite nail paint.
5. Applying Your DIY Nail Wraps:
- Use Tweezers: With the help of tweezers keep your stickers properly placed on your nails.
- Secure the Stickers: Make sure the surface is even and smooth without any potential wrinkles or bubbles finalized with a flawless finish.
- Trimming Excess Sticker Material: Cut off any extra sticker from the edge and make the shape fresh and neat.
- Applying a Topcoat: Finalize with a topcoat that adds shine to the outlook.
6. Alternative Methods For Scary Nail Decals:
- Water Transfer Nail Decals: These nail decals could be a great option as they are predesigned and you only have to try the water transfer technique to get them applied.
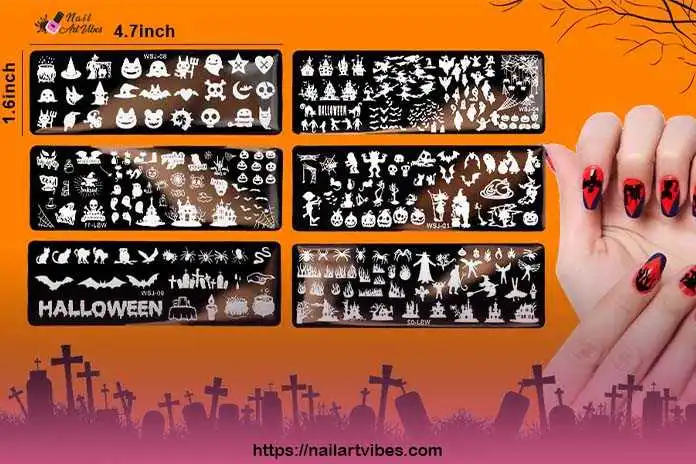
- Nail Stamping Plates: Halloween nail stamping plates are very creative and come with plenty of Halloween nail art designs.
- Freehand Painting: If you have creative skills you can try your spooky art on the canvas of your nails.
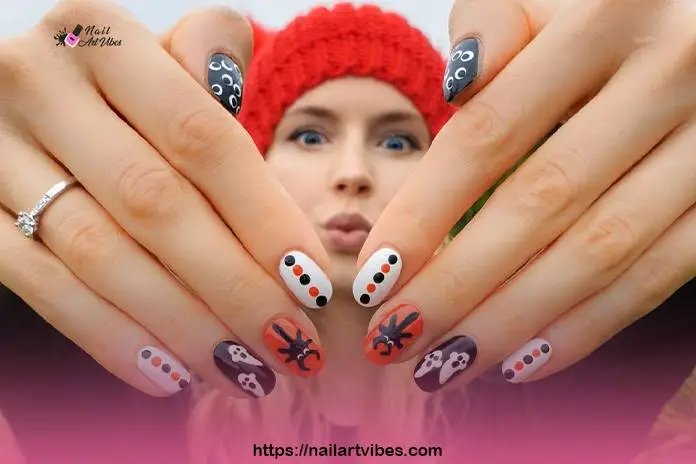
7. Creative Halloween Nail Art Decal Ideas:
- Mix and Match Designs: Create a collage of spooky nail design motifs on your nails for a dynamic look.
- Ombre Effects: Blend two or more Halloween colors for a striking and unique appearance.
- Glow-in-the-Dark Accents: Consider applying glow-in-the-dark polish for a spooky Halloween touch.
- Matte vs. Glossy Finishes: Try and finalize both glossy and matte top coats and choose what you like most.
8. Tips for Long-Lasting Halloween Nails:
- Ultimate Nail Care: Routine nail care is the secret to flawless manicure, regularly apply moisturizer and keep the nails and cuticles healthy.
- Avoiding Smudges and Chips: Don’t use your nails as tools to open or lift objects.
- Topcoat Maintenance: You may try applying a topcoat every two to three days to protect the shine and finish of your manicure.
9. Removing Your Halloween Nail Stickers:
- Removal Techniques: Opt for acetone-free polish remover to remove, it will be taken off easily.
10. Inspiration Gallery:
Showcase stunning Halloween-themed nail designs with detailed step-by-step images, providing a visual feast of creativity for readers.
For ghost nail decals and other spooky nail decorations offering decals for Halloween if you’re not interested in doing it yourself, we have a way out. Research well and you can get cheap options for the market or any online market.
FAQ’s
Q: How do I apply Halloween self-adhesive nail art decals at home?
A: Apply nail decals stickers to clean, and dry nails. Cut to size, remove protective film, press on nails, smooth out bubbles, and seal with topcoat. It will show your Halloween spirit to everyone.
Q: Can I use regular polish with Halloween nail wraps?
A: Yes, use regular polish as a base and a clear topcoat for added protection. You can create matching polish colors to create any design as if it is skull nail art or bat nail art. You can create pumpkin Halloween nail wrap decals as well.
Q: How long will nail decal Halloween nail wraps last on my nails?
A: Halloween decals self-adhesive nail art lasts from a few days to two weeks with proper care.
Q: Can I remove nail wraps on Halloween easily?
A: Soak, gently peel off, and use a polish remover for the residue of Halloween nail wraps.
Q: Can I create my own custom Halloween nail wraps?
A: Yes, design, print on decal paper, and follow instructions to apply. A unique Halloween nail manicure is yours!
Conclusion:
Halloween is the season to unleash your inner nail artist and embrace your spooky side. With this comprehensive guide, you’re well-equipped to craft captivating DIY decals and Halloween art that will steal the show at any Halloween gathering.
So, gather your supplies, choose your designs, and let your DIY nail art shine with this amazing Halloween manicure.
The Halloween skull water transfer nail art idea is amazing enough and you can create scary and cute Halloween nail decal transfer DIYs.Happy Halloween, fellow nail enthusiasts!