DIY Nail Buffing Cream: Secret to Shiny Smooth Nails
As a nail care enthusiast and professional nail tech, I can tell you that nail buffing is the top secret to achieving healthy, shiny nails. Trimming is only the basic, putting in a pinch of extra effort is what you need.
To truly bring out your nails’ shine, softness, and neatness, you have to think about buffing natural nails. This is the only technique to achieve beautifully blossoming nails that everyone notices.
In this blog, we’ll see DIY nail buffing techniques, the benefits of using a good nail buffing cream, and the best tools to make your nails look and feel fabulous.
Sure! Here’s how you can continue the blog post, discussing DIY nail buffing cream, nail buffers, and techniques:
DIY Nail Buffing Cream: Why It’s a Game Change
Like every vital procedure, without supplies, there’s nothing to do. So, for results that are your focus, the right buffing cream for nails makes all the difference. If you have a good tool and technique, you are going to achieve limitless benefits of buffing nails, including smoothing out rough spots, but also nourishing your nails.
Buffing creams with gentle abrasives can be more useful for exfoliating than harsh chemicals. Dead cell removal will revive health and leave an impeccable shine.
Why DIY Buffing Creams Are Worth Trying
With Store-bought fingernail buffing creams, you may get the job done, but DIY nail buffers can make you save money that you spend on buying those expensive buffing creams.
Diy buffing creams also make sense when you someone more conscious about the ingredients their harshness and their impacts relatively.
The ingredients used in making your DIY version are natural, nourishing, and healthy for your nails
Plus, making your nail buffing cream means you can control exactly what goes into it, ensuring it’s safe, effective, and exactly as per your needs.
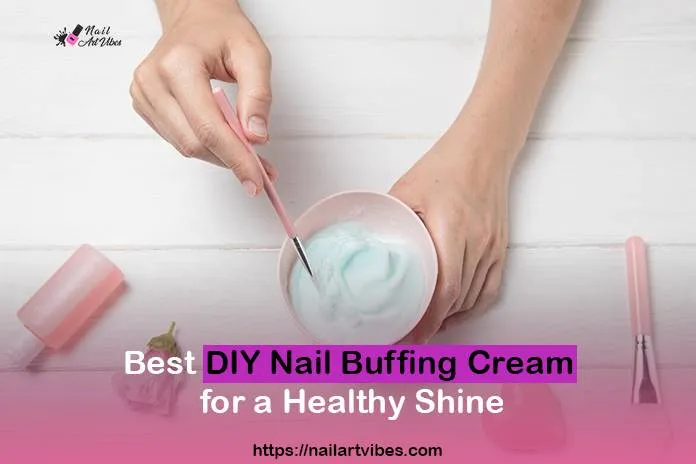
Making Your DIY Buffing Cream
If you’re up for a fun little fingernail buffing cream DIY project, here’s an easy recipe for a homemade buffing cream that works wonders:
What you’ll need:
- 1 tablespoon of coconut oil (perfect for moisturizing)
- 1 teaspoon of shea butter (for extra nourishment)
- 1 teaspoon of finely ground sugar (this acts as a gentle exfoliant)
- A few drops of essential oil (like lavender, for a calming scent)
How to make it:
- Step one is to mix the coconut oil and shea butter, continuing to stir until well combined.
- Infuse sugar and stir it nicely to get a perfect scrubby texture for nail buff cream.
- A few drops of essential oil will do magic and will offer a relaxing touch.
- Buffing cream is ready, now you can keep it for immediate or later use.
Not only is this nail buff cream easy to make, but it will leave your nails feeling soft, smooth, and with a natural shine that’s hard to beat.
Choosing the Right Nail Buffers
The potent nail buffers necessarily help achieve smooth, shiny nails. From several types to choose from the real struggle is to find one that is exactly as per your nail type and which aids you get the desired outcome. Check what options do we have.
Four-Way Buffer: This is a multi-sided buffer with different textures to shape, smooth, and shine your nails. Start with the coarser side to smooth out ridges, then move to the finer sides to refine and add a natural gloss to your nails.
Buffer Blocks: These are perfect for everyday use and usually have two sides—one for rough buffing and one for polishing. Buffer blocks are ideal for removing any bumps and giving your nails a high-shine finish.
Electric Nail Buffers: If you’re looking for a more advanced tool, electric buffers are great for quick, efficient results. They can help you buff your nails more evenly and save time, especially if you’re buffing regularly.
Buffing Techniques for the Best Results: How to Use Nail Buffing Cream
While using the right tools and creams is important, how you use them is key to achieving perfect results.
Follow the procedure to buff your amazing nails for a saloon-like finish;
1. Prep Your Nails: Trim as required and make sure your nails are clean Wipe away old polish stains and other things and prep your nails by pushing cuticles.
2. Buff Gently: Don’t overdo it! Excessive buffing can damage the nail surface. Buff in gentle, circular motions, and be careful not to over-buff in one area.
3. Focus on Ridges and Imperfections: If you have ridges or unevenness in your nails, focus on those areas first. Buff them lightly until the surface feels even.
4. Add Shine: After smoothing out the nail surface, finish with the shine step. Use the smoothest side of your buffer or a polishing cloth to bring out a natural shine.
5. Moisturize: When finally the buffing is done dried nails will worsen the condition, immediately moisturize them to get the nail and cuticle skin hydrated.
Conclusion
Caring for nails is just as self-care must be. Your personality needs to be defined by employing cleanliness, neatness, and hygiene so nail care is an integral part of it.
Buffing your nails is all about a world of difference in this concern. Whether you’re mixing up a DIY buffing cream in your kitchen or testing out a new nail buffer, the key is finding what works best for you.
So, next time you want that smooth, shiny, salon-worthy finish, remember it’s all in the buffing!